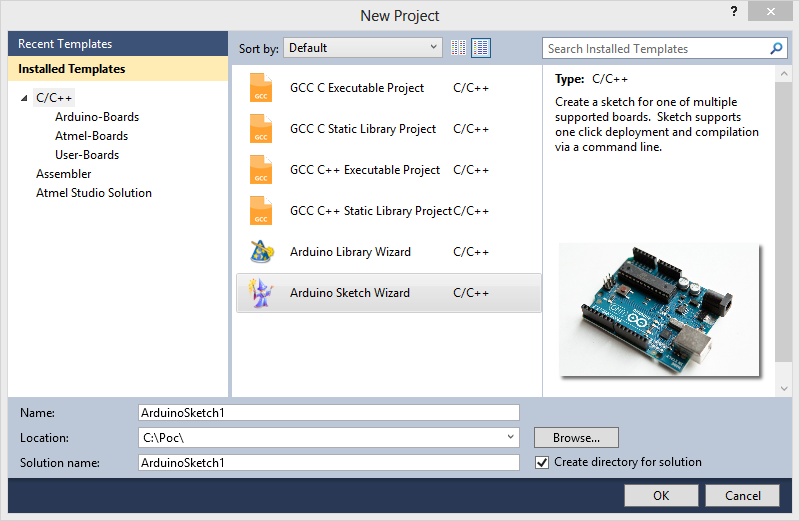
In this post we’ll go over creating a sketch with Arduino Template Express. I assume you have followed the instructions of how to install ATE from my previous post. Launch Atmel Studio and select File\New\Project or Ctrl-Shift-N.
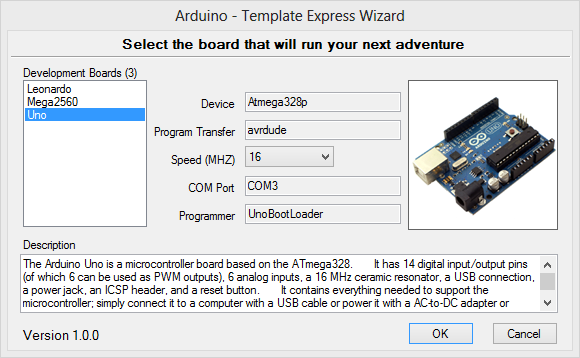
Select Arduino Sketch Wizard, give it a proper name and location and hit OK. The wizard will be launched with the list of development boards you have configured during installation or after installation by modifying the boards.xml file.
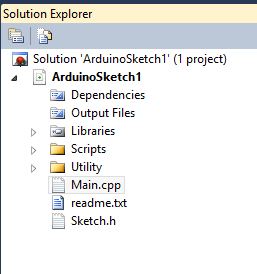
I will use the Uno board for this example. Pick an appropriate board from your setup and hit OK. Atmel Studio will render a new project with the following layout.
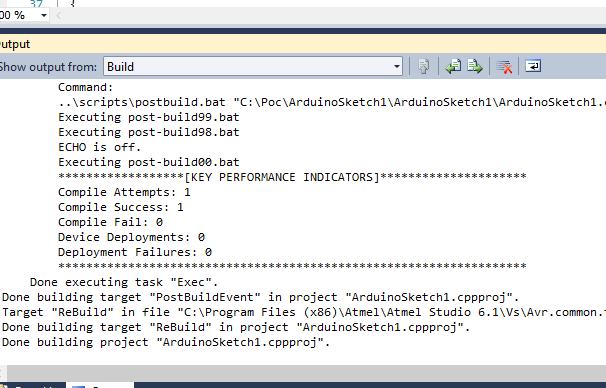
This sketch flashes the on board LED and sends a running counter via the serial port. Compile the sketch and take a look at the output window.
The sketch is compiled and as part of the compilation the template keeps track of how many successful and failed compilations have taken place. It also keeps track of how many successful/failed deployments occur. Let’s deploy this puppy. Select Tool\Deploy or press deploy in the tool bar if you have it configured. The output window should display the outcome of the deployment. If you launch a terminal window and connect it to your development board data port, you will see a running counter every time the LED flashes.
Additional Goodies Included Provided by ATE
- Take a look at Utility\BuildDate.cpp. This file gets rebuilt every time the sketch is compiled. It generates the time stamp of the last build and you can store it in ram, EEMEM or PROGMEM. You can optionally use this information by calling GetBuildDate().
- Utility\BuildInfo.cpp has ShowBuildInfo() to output build information to the Serial port.
- Utility\BuildNumber.cpp keeps track of how many successful deployments has been made. You can optionally use this information to keep track of your deployments.
That’s all for now. In my next post we will go over creating libraries with ATE.


