I have been running Mercurial for a couple of years on a hacked DLINK DSM-G600 network storage device. For a small budget and low power solution, the funplug hacks available for the DSM-G600 work very nicely. I have outgrown this configuration and needed more space, backup options and faster data transfers than what is provided by the DSM-G600. To accomplish this, I setup Ubuntu 11.10 (Oneric Ocelot) in an old PC and installed a pair of 2TB Seagate hard drive in RAID1 mode (mirrored) to increase the reliability of the repository. This post documents step by step the configuration of Mercurial in Ubuntu 11.10.
Requirements
Before getting intimate with apt-get, let’s discuss the requirement for the installation of Mercurial.
- A 2TB mirrored drive will be used to host the Mercurial repositories. The path to the drive is /media/disk1.
- The Mercurial server needs a static IP address in order to have a consistent location for clients to use.
- An entry will be created in the client host file to access the Mercurial server by name rather than IP address. If you have your own DNS server, this step is not required. For my installation the name of the server will be alexandria, as in the library.
- All remote access to the Mercurial server will be done using the http protocol. An installation of Apache is required.
- All remote access to Mercurial will require a user id and password. Since this is a personal installation, only one user will access Mercurial.
Overview
To put the installation in perspective, its best to agree on what is it we are going to accomplish. Figure 1, illustrates how the different components related to Apache, security and Mercurial interact with each other.
All the configuration files with a red star will be modified during the installation and configuration of Mercurial. Table 1, contains a description of the different configuration files involved in the installation.
[table “5” not found /]
A developer using the command line hg tool or TortoiseHg sends request to a well defined repository URL in Apache. Apache knows how to handle the request by virtue of a mercurial config file which reference the hguser password file to handle security and invokes the hgweb.cgi to handle the actual request. The hgweb.cgi file knows which Mercurial routines to invoke and how to get to the repositories via the hgweb.config file. Mercurial reads global settings from the hgrc config file. This is a simplistic view, but should give you a general idea how the entire configuration is put together.
Installation
This tutorial assumes you can understand simple bash commands, have physical or remote access to the Ubuntu server and have configured the space where the Mercurial repository is going to be installed. Let’s get started.
Step 1 – Assign a static IP address to the server
Follow this instructions to assign a static IP address to your server. This will make the interaction between the server and the client consistent every time.
Step 2 – Add entry to client host file
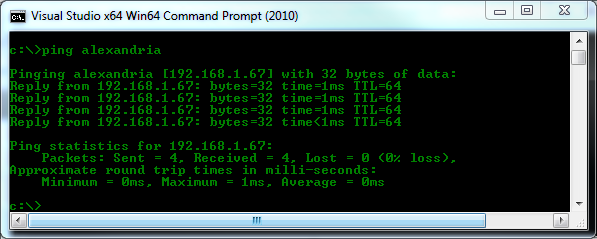
Follow this instructions to add an entry to your host file in Windows 7. This will allow you to browse or use the hg command line tool without having to remember the ip address of the server. After performing this step you can open a command window and ping the server by name. In my case ping alexandria shows the Ubuntu server is online. See Figure 2.
Step 3 – Update UBUNTU Software and check version
Connect to the Ubuntu server and open a shell to verify the software in your server is up to date. While you are at it, verify the version of Ubuntu you are running. I performed my installation from a Windows 7 PC using Putty to connect over ssh to the Ubuntu server.
sudo apt-get update #Update software packages
lsb_release -a #Verify Ubuntu version
Step 4 – install apache
Install Apache if you already haven’t. You can check if Apache is already installed by pointing a web browser to the Ubuntu server and see if the “It Works!” message is displayed. If not, install Apache with the command below. Alternatively you can test directly from the shell by doing a wget localhost. You will see the 200 OK response code.
sudo apt-get install apache2 #Install Apache server
wget localhost #optional verification Apache is running
Step 5 – install mercurial
Next step is to install Mercurial.
sudo apt-get install mercurial #Install mercurial
Step 6 – configure master hgrc configuration file
Now that Mercurial is installed, let’s configure the master hgrc configuration file. The goal is to enable the following functionality.
- Remove Mercurial SSL restrictions
- Allow to push repository from the web
- Allow repositories to be downloaded in multiple compressed formats
- Trust the user www-data. This is the the account used to run Apache. Not having www-data as a trusted user in the hgrc config file generates a nasty error while updating a repository.
sudo nano /etc/mercurial/hgrc
#type the following in the hgrc file
[web]
allow_push = *
push_ssl = false
allow_archive = gz, zip, bz2
[trusted]
users = www-data
Step 7 – Configure personal hgrc FILE in server
Configure your personal .hgrc file in the Ubuntu server with your user name. This file gives you the opportunity to personalize the Mercurial experience.
cd ~  # go to home directory
nano .hgrc
#type the following
[ui]
username = Your Name
Save the file and proceed to the next step.
Step 8 – create sample repository
Let’s create a sample repository right at the root of your home drive. We’ll use this repository later to test access to Mercurial through the web server.
cd ~  # go to home directory
mkdir repository1
cd repository1
hg init
echo Hello World! > readme.txt
hg add readme.txt
hg status
hg commit -m 'My first repository!'
hg tip  # shows the tip of the repository
We have just finished creating a repository with one readme.txt file in it.
Step 9 – Configure mercurial base directory
Next step is to configure the directory from where Mercurial is going to serve repositories via Apache. As stated before, the location for the installation of the the repository is /media/disk1/mercurial, if you are not using a dedicated drive chances are the location of your repositories is /var/hg.
cd /media/disk1/
sudo mkdir mercurial
sudo mkdir mercurial/repositories
#Change the owner of the repository to the Apache user
sudo chown -R root:www-data mercurial
Step 10 – Configure mercurial web configuration file
Let’s configure the hgweb.config. For now we only need two entries in the file. One to control display style and the other to indicate where is the repository. Open a new hgweb.config file with nano or vim, enter the text below and the save the file.
cd /media/disk1/mercurial
sudo nano hgweb.config
Enter the text below and save the file.
[web]
style = gitweb

[collections]
/media/disk1/mercurial/repositories = /media/disk1/mercurial/repositories
Step 11 – Configure mercurial cgi sCRIPT
Let’s configure the hgweb.cgi script in order to serve the repositories via Apache. Instead of writing an entire file ourselves, we’ll use the one provided by Mercurial and make the necessary modifications.
cd /media/disk1/mercurial
sudo cp /usr/share/doc/mercurial/examples/hgweb.cgi . # do not forget the dot at the end
sudo chmod a+x hgweb.cgi
Open hgweb.cgi with nano or vim and find the line that reads config=….. and replace with the following.
config = "/media/disk1/mercurial/hgweb.config"
Step 12 – register mercurial cgi with apache
Next let’s configure Apache so it runs the hgweb.cgi when the /mercurial virtual directory is requested. Instead of modifying the default configuration file, let’s create a separate configuration file and link it to the default Apache configuration file.
cd /etc/apache2
sudo mkdir mercurial
cd mercurial
sudo nano mercurial.conf
Type the following in the mercurial.conf file. Note I have intentionally left security out of the file in order to test the installation without security first.
ScriptAliasMatch ^/mercurial(.*) /media/disk1/mercurial/hgweb.cgi$1
<Directory "/media/disk1/mercurial/">
Options Indexes FollowSymlinks MultiViews ExecCGI
AllowOverride All
Order allow,deny
Allow from all
AuthType Basic
AuthName "Mercurial Repositories"
AuthUserFile /media/disk1/mercurial/hgusers
Require valid-user
</Directory>
The next set of commands link the mercurial.conf file to Apache. This let the web server knows how to handle requests to /mercurial.
cd /etc/apache2/sites-available
sudo nano default
# Type on the line before
Include /etc/apache2/mercurial/mercurial.conf

#restart the apache server so the changes take effect
sudo apache2ctl restart
Step 13 – Test web access to repository
Let’s copy the test repository we created to /media/disk1/mercurial/repositories in order to serve it through the web. Note you need to change the owner of the directory structure in order for Apache to serve the directory properly.
cd ~ # go to your home drive
sudo mv repository1 /media/disk1/mercurial/repositories/.
sudo chown -R root:www-data /media/disk1/mercurial
Launch your browser pointing to http://servername/mercurial. You should see one repository with the options to download in multiple compressed formats. See Figure 3 for reference.
Before running the next steps to test cloning the repository, let’s do a a bit of cosmetic housekeeping on repository1. Let’s populate the description and contact.
cd /media/disk1/mercurial/repositories/repository1
cd .hg
sudo nano hgrc
#type the following
[web]
contact = Omar Francisco
description = Hello World Project!
Refresh your browser and how you should see the contact and the description populated. Nice!
Step 14 – Clone Repository From Client PC
Let’s test cloning and then updating the repository. From the windows client computer open and command window and perform the following steps.
cd %USERPROFILE%/documents     # go to the documents folders
hg clone http://alexandria/mercurial/repository1    #clone repository1
cd repository1   # go to the repository
dir c:\ > readme.txt  # update readme file
hg status # see the file readme.txt has been modified
hg commit -m "Remote Changes To Readme File"
hg push http://alexandria/mercurial/repository1
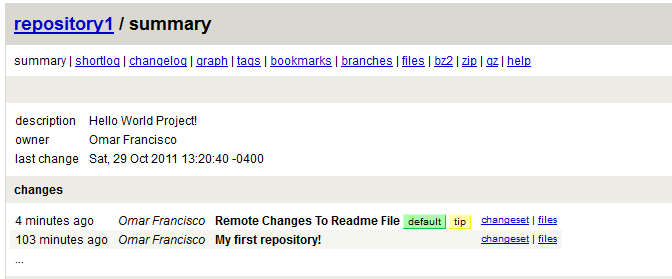
Browse to the repository and click on the repository1 link. You should see information similar to that of figure 5.
We have reached a milestone in the installation of Mercurial. If you are not interested in security, then this is it. We are done. If on the other hand you want to secure access to your repositories, then continue reading.
Step 15 – Configuring security
In order to configure security, we need to instruct Apache to only allow access to users who are registered in a password file.
cd /media/disk1/mercurial
# create password file - need to type user password twice
sudo htpasswd -mc hgusers hgadmin
sudo chown root:www-dta hgusers
# type the password twice - repeat command for more users
Edit the mercurial.conf file in /etc/apache2/mercurial to read as follows
ScriptAliasMatch ^/mercurial(.*) /media/disk1/mercurial/hgweb.cgi$1
<Directory "/media/disk1/mercurial/">
Options Indexes FollowSymlinks MultiViews ExecCGI
AllowOverride All
Order allow,deny
Allow from all
AuthType Basic
AuthName "Mercurial Repositories"
AuthUserFile /media/disk1/mercurial/hgusers
Require valid-user
</Directory>
This changes configure Apache to allow users registered in the /media/disk1/mercurial/hgusers file to browse the repository. Be extremely careful typing the modifications to the mercurial.config file. Apache is very unforgiving of typographical mistakes. In the event you get errors while trying to login through the web check the /var/log/apache/error.log for the cause. For your reference, figure 6 contains a listing of the /mercurial directory after the installation is completed.
Performing a hg clone http://alexandria/mercurial/repository1 now requires the user to provide an ID and password in order to have access to the repository. We are done, go and write some code to test drive your Mercurial installation.


